Homemade Dog Treats: Tips & Tricks
This page features all my favorite homemade dog treats tips and tricks - so you can start creating perfectly delicious (and nutritious) goodies for your dog right now.

Making your own dog treats is easy and fun, it's also the healthiest and most economical choice.
You don't need to be an experienced baker, or have any fancy equipment. Ingredients are easy to find and chances are you already have what you need to make at least one recipe right now.
I love whipping up new recipes (and old favorites) for my dogs, Ivan and Dax (meet them here) to enjoy, it's relaxing and fun... and the boys love my baking days!
Along the way I've picked up tips that makes the whole process even easier, faster, cleaner and more consistent. I hope they help you too!
Dog Treat Ingredient Tips
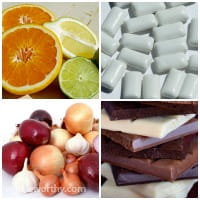
There are tons of different ingredients you can use in your homemade dog treats but it's also hugely important to know which foods you CAN'T use!
Some popular human foods are actually dangerous for our dogs, some are even deadly, so before you get started check out this page to make sure you don't accidentally give your little guy or gal something toxic.
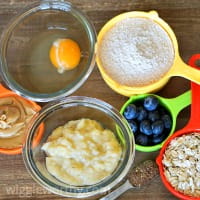
A basic dog treat recipe generally includes:
- Flour (or a blend of different flours)
- Fat or oil
- Fruits or vegetables
- Liquid (milk, bone broth or even water)
You can follow a recipe exactly or substitute similar items, for example:
- Applesauce and pumpkin or carrot puree are interchangeable
- You can substitute almond butter for peanut butter
- Grated apple and zucchini are very similar
- Mashed banana can replace pureed fruit or vegetables
- Replace dairy products with non-dairy alternatives
I always use either whole wheat flour or one of the many gluten free flours.
Check out my page of tips on how to substitute different ingredients in your recipes for ideas and how-to's.

There are a wide range of flours to choose from when you're making dog treats BUT it's important to know that gluten free flours are all quite different, and they don't act the same way as wheat flour does in a recipe. If you try to substitute one for another you'll need to adjust other ingredients to allow for this.
If you're dog is gluten intolerant and you're fairly new to making your own dog treats I'd recommend following recipes which are already using gluten free flour if you want a reliable result.
It takes time, practice and a bit of experimenting to re-jig a recipe to use a gluten free flour but if you don't mine a few failed attempts (and your dog won't mind at all! Mine are even thrilled with the failures) feel free to experiment until you get the balance right.
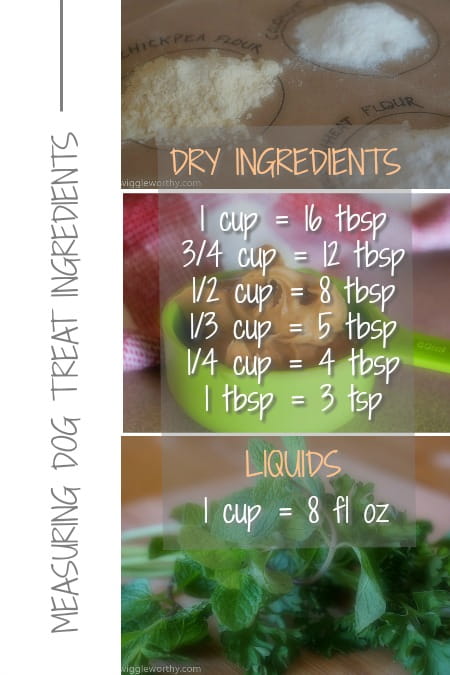
Measuring Dog Treat Ingredients
Measuring ingredients for your homemade dog treats seems pretty straightforward, but it's important to match the right measuring equipment with the right ingredient.
Dry ingredients (such as flour, sugar, baking powder etc.) are measured using cups or spoons.
Liquid ingredients (such as water, milk, broth etc.) are measured using a liquid measuring cup/jug.
When you're measuring flour or other dry ingredients, pour (or spoon) it into your measuring cups instead of scooping it out of the bag with the cup. Also, don't pack it down, let it fill the space naturally. You'll get a much more accurate measure this way.
But what about things like grated fruit/vegetables or spinach leaves, or carob chips?
Or those not-liquid-but-not-dry ingredients like peanut (or almond) butter, yogurt, applesauce etc?
Let's start with the second group first. Use your dry measuring cups for the semi-solid ingredients such as peanut butter or similar. With peanut or almond butter I always spray the cup lightly with olive oil before filling it, that way it doesn't stick so much and you lose less.
I do the same when I'm measuring molasses, honey, maple syrup or other sticky semi-liquid ingredients. A little spritz of oil makes everything easier (whether you're using a measuring cup or a measuring spoon).
Super-healthy coconut oil is one of my favorite dog treat ingredients but if you're not familiar with using it, measuring it can look confusing at first. This is because coconut oil is solid at any temperature below 76F, and liquid when above that. When you're baking you want your coconut oil to be liquid before you add it to the recipe.
Luckily, whether it's solid or liquid, coconut oil takes up about the same volume of space (ie. one cup of solid coconut oil will melt to form one cup of liquid coconut oil). Use your dry measuring cups or spoons for this.
You can melt coconut oil over a low heat, or in the microwave.
When measuring fresh spinach, parsley or other fresh greens/herbs, use a dry measuring cup and loosely pack the leaves into it. Once chopped it will take up a little less less space.
If a recipe asks for '1/4 cup chopped parsley' you may want to chop the parsley before you measure it. If it asks for '1/4 cup parsley, chopped' (or the instructions say 'chop parsley' at some point) then measure it un-chopped. But honestly, don't stress about this, it doesn't make a huge difference either way when you're making dog treats!
If your recipe calls for shredded chicken or beef, you can pack it loosely into a dry measuring cup too.
Oh, and those carob chips? Just use your dry measuring cups and pour them in. Easy!
Technique Tips For Homemade Dog Recipes
Okay, so we have the basics - the recipes and which ingredients to use, and how to measure them.
Now we come to actually making those delicious treats and the tips and tricks which can make the process easier... and more fun.
Firstly, I have some favorite baking tools and supplies, and every item is on that list for a reason!
Number one on that list are my silicone baking mats, these help my dog treats cook evenly, stops them from burning, and make clean up a breeze.
They're also versatile enough to do double-duty when you're rolling out dough.
How? Well, that's the technique part! Some doughs are sticky, and rolling them out on paper or parchment keep counter tops clean and makes cleaning up easier. BUT, paper slips when you're rolling so it's important to put something non-slip between the bottom sheet and the counter top. Silicone baking mats are ideal for this. You can also use that non-slip shelf lining material like this...

Silicone molds that are oven and freezer safe are great for both baked and frozen dog treats. They're really easy to clean too. I spray them with olive oil spray before baking treats and a little warm soapy water is all that's needed to make them good as new. Take a look at this set to see what I mean. Silicone baking cups are awesome for pupcakes too.
My next tip would be to invest in a set of oblong (squared off) measuring spoons because they fit into small spice jars and bottles, hold oil and liquid ingredients without spillage, and are just all around easier than their rounded counterparts. These are the ones I use daily.
One of the things I love about creating dog treat recipes is choosing the cookie cutter shape for each new batch. I have a pretty extensive collection which includes all kinds of shapes in all kinds of sizes and some of my personal favorites are the teeny-tiny cutters and my personalized dog bone cutters (I got these on Etsy).
Pretty up your creations! You can give your treats a shiny surface by brushing them with an egg wash before baking. This works for sweet and savory treats.

To make egg wash beat one egg (you can use a whole egg, just the yolk or just the white) in a small bowl with 1 tbsp of milk or water.
For pupcakes there are a variety of ways you can ice or frost them, but don't use regular confectioners sugar or human frosting, it's much too sweet and no dog needs that amount of sugar!
Do bear in mind that iced or frosted treats/pupcakes don't store easily, and can spoil faster, so decorate them as and when needed. Egg wash is fine and doesn't cause this type of problem.
Make treats easy to break into smaller portions...
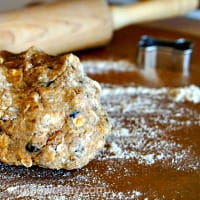
If your'e baking medium to large sized dog treats you can make them easier to break into smaller pieces by scoring them with a knife before baking. This is especially useful if you have a small breed, puppy or senior dog (who may have difficulty chewing large treats) or if your dog is overweight.

Once you've got your treats made, you need to store them properly. In general, storing homemade dog treats in an airtight container in the refrigerator is the very best way to keep them fresh.
The ingredients used in each individual recipe are the most important indicators of how long, and how well, treats will keep. Moist treats have a shorter shelf life, as do treats made with certain gluten free flours. Dog treats containing any type of meat product also have a tendency to spoil faster.
Of course you can make your dog's treats with the most basic equipment but I love to add a touch of fun by investing in a few simple doggie-themed accessories.

If your dog loves his treats super-crunchy here's a little tip that will help make him happy (and help them stay fresh for longer)... After your treats are finished baking, turn off the oven, crack open the door and leave the treats there for another 30 minutes to an hour to continue to dry out in the gentle heat. If you have a dehydrator you can even pop your treats in there to up the crunch-factor. Just don't overdo it especially if you have a small breed or senior dog, or a puppy, as they usually do better with slightly softer treats.
You Might Also Like These pages...
- Home
- Making Dog Treats
- Homemade Dog Treats Tips & Tricks