Dog Treat Baking Supplies
I'd have to say that you don't actually NEED any special dog treat baking supplies to create tasty goodies for your dog, but you will need a few basic items... most of which you probably have in your kitchen right now.
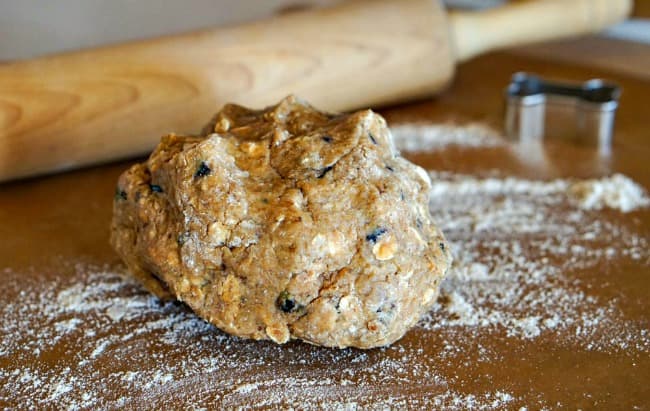
However, there are some really cute items which can make your treats extra-special and a few that make the whole process easier as well.
This page looks at both the basics, and the optional extras that add a little 'Awww' to your homemade dog treats.
Basic Baking Supplies for Dog Treat Recipes
Here's a list of the must-have's which are simple to find just about anywhere (if you don't already own them).
- Measuring cups
- Measuring spoons
- Measuring jug
- Assortment of mixing bowls
- Wooden spoon
- Whisk
- Rolling pin*
- Flour shaker (for dusting work surface and rolling pin)
- Wax paper (used for rolling out dough)
- Basic cookie cutters or a sharp knife
- Cup cake cases or muffin pan
- Cookie sheets (aka baking tray)
- Wire baking rack (for cooling treats)
- Airtight containers or ziploc bags for treat storage
* I prefer to use a wooden rolling pin because the surface traps flour and you can dust it liberally (or lightly) before using depending on the type of dough you're working with.
Items That Make Baking Dog Treats Easier
There are two items which make baking up a batch of treats a little easier and I swear by them. I want to share them with you so that you can benefit from them right off the bat.
Oblong Measuring Spoons
Why oblong? Aren't most measuring spoons round or oval? Well, yes they are and of course it doesn't matter what shape they are when it comes to measuring accurately.
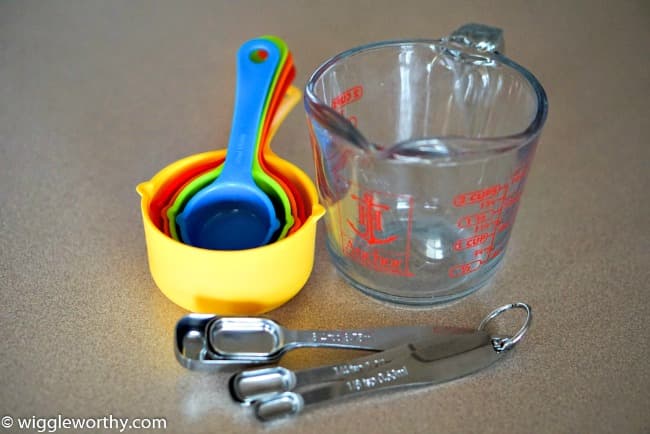
The difference comes when you're trying to add spices or anything that's stored in a small jar!
A round spoon is unlikely to fit in a spice jar, and tipping spices out onto a spoon leads to mess, and waste. But an OBLONG measuring spoon slides right on into the jar and comes out easily, no mess, no fuss. So simple and yet it really does make life easier.
Non-Stick Silicone Baking Mats
Oh my goodness, these are literally AMAZING! My daughter first told me about these as she uses them to make cookies. I always just used a baking pan, sometimes I greased it and sometimes I lined it with baking parchment, but often my cookies would burn on the bottom or not bake evenly.
That doesn't happen when you line your baking tray or cookie sheet with a silicone baking mat. I don't know exactly why they work so well, but they do. My dog treats come out evenly baked, not burned, and they never stick.
The mats are super easy to clean with a damp cloth, or with warm water and a mild dish soap if the treats were especially sticky or oily.
These are one of my must-have dog treat baking supplies for sure.
Special Items for Baking Dog Treats
Okay, now we have the basics out of the way we can get to the fun part!
I love creating new homemade dog treat recipes and also really enjoy making them look cute.
Of course I know Ivan and Dax don't care how they look, all they care about is how those goodies taste, but I love to see a whole tray of cute little bone-shaped treats, or turn out adorable heart-shaped frozen treats. It's just part of the process for me.
Dog Treat Cookie Cutters
These are some of the most fun items in my baking supplies cupboard and go well beyond your basic round or oval cookie cutters.
There's a good selection of different dog-themed cookie cutters available, in a range of different sizes. You can also buy personalized cookie cutters (eg. that stamp your dog's name on the treats), and also cookie stamps which can add letters or other designs.
What you choose to use depends on personal taste and whether your budget extends to fancy items or not. Most of the basic dog treat cutters are fairly inexpensive, the personalized ones can be more pricey.
My personal dog treat baking supplies include a selection of dog treat cookie cutters which include:
- Dog Bones
- Dogs
- Hearts
- Dog theme kit - dog house; fire hydrant; dog; bone
- Easter Eggs
- Carrot
- Gingerbread Man
- Personalized Dog Bone Cutters
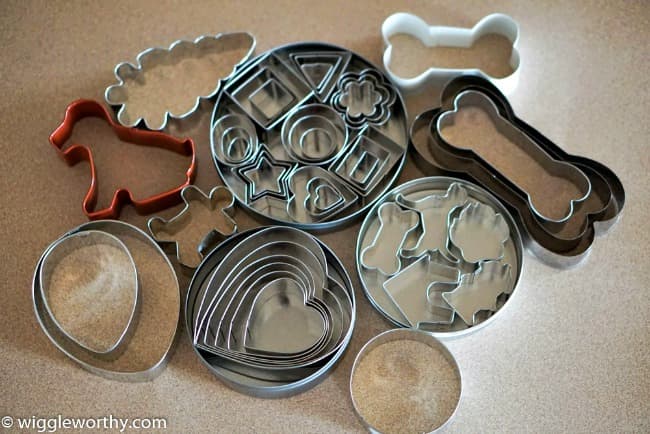
I also have a tin which contains a selection of small cutters in various sizes, including stars, squares, flowers, circles, ovals, triangles and oblongs. It's a very versatile collection and I use it a lot.
I got these personalized dog treat cookie cutters from a vendor on Etsy and I love them....
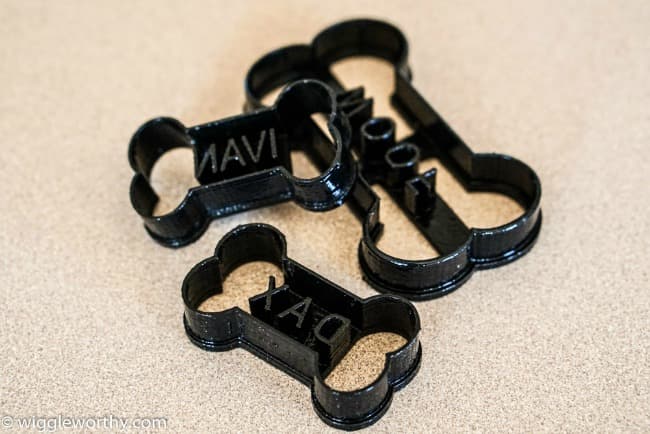
Whatever style of cookie cutter you choose, I'd recommend getting several different sizes because you probably don't want all your dog treats to be the same size.
Bigger dogs might do better with bigger treats, smaller dogs (or puppies/seniors) might prefer smaller ones. Training treats should be tiny.
Then there's the fact that some dog treat doughs are easy to work with and you can cut out small treats or those with more fiddly designs easily. Other doughs are sticky or richly textured and do better with simple shapes or larger treats.
Silicone Baking Molds
Silicone baking molds are very versatile and can be used in the refrigerator, freezer and oven. They're such fun and can be a great time saver too.
They come in a wide variety of sizes and shapes, and if you're making frozen dog treats they're perfect for creating cute treats rather than just using ice-cube trays or Popsicle molds.
Silicone molds also work great for softer doughs which don't roll out easily, or are fiddly to work with.
Only choose food grade, BPA-free silicone molds. I love the Le Dogue brand because their silicone is FDA approved so I know it's safe.
Best storage containers for homemade dog treats
The final step in the whole process of making dog treats at home is to store them properly (find out how to properly store any type of homemade dog treat HERE).
Choosing the right storage containers for the type of treat, and storage location is important.
Glass, ceramic or stainless steel treat containers are all good choices. Ceramic is my favorite option. There are loads of sizes, styles and designs to choose from in all of those materials.
For treats being stored in the refrigerator, glass still works well and so do BPA-free plastic containers, and again there are tons of choices. If you're storing frozen treats, or freezing a batch for later, choose your storage container wisely.
Freezer bags are always a good option, but for something a little sturdier (and more attractive) there are other choices.

One of my favorites are the Brilliance storage containers by Rubbermaid. They're BPA free, leak-proof, dishwasher safe, freezer-safe, microwave safe, super air-tight and stackable. You can easily see what's inside too as they're really clear and don't deteriorate after washing or freezing.
They're also attractive enough to sit out on the kitchen counter top which is an added bonus.
Optional Extra's
As I said right at the beginning of this page, you don't need any fancy kitchen items to make your own dog treats. Basic baking supplies will work just fine. However, adding a few of the items listed above will make your treat-making adventure more fun, and some of them will also make it easier.
There are a couple of other items I think are worth mentioning because they can come in handy. You may already own one, or all of these, if not there's no need to run out and buy them! But if you want to have 'all the trimmings' I could suggest adding these:
Food Processor
A food processor does so many things that it's one of a baker's most versatile pieces of equipment. You can chop just about any ingredient which needs chopping, grate or shred, puree fruits or vegetables, mix dough.... if you want to really go to town you can even make your own nut butters, or gluten-free flours. The options are pretty impressive.
Coffee Grinder
Of course you're not putting coffee in your dog treat recipes, but a small coffee grinder is great for grinding nuts and seeds (I keep a separate one to use for baking needs so no caffeine has a chance of slipping into my treats). Caffeine or coffee is deadly dangerous for dogs.
Dehydrator
If you want to try making dog treats which are dried (ie jerky, dried vegetables etc.) a dehydrator is a great tool to add to your arsenal.
It's super simple to make delicious, healthy, single-ingredient dog treats this way. It takes several hours to remove all the moisture from whatever you're dehydrating but there's practically zero work required from you.
You Might Also Like These pages...
- Home
- Making Dog Treats
- Dog Treat Baking Supplies
